
The unique Hall’s Rainsaver repositionable gutter kit is installed with its patented brackets clamped to the roof edge of your shed – up to 3″ in thickness. It even fits plastic sheds (not the Keter Artisan) but may require anti-slip grip material if the plastic is slippy. The kit comes with pre-cut lengths so there’s no cutting required. The movable nature permits multiple butts to be filled simply by moving the gutter to various alternative positions to fill as many butts as you can fit! However those that want full coverage of their 8ft, 10ft or 12ft garden buildings or even longer, we have extended size kits available and further extensions too!
The versatile bracket design allows rotational and lengthwise movement and positions at the roof edge, ensuring the gutter is always optimally placed for collecting rainwater for delivery into the containers of your choice.
Made with standard UV stabilised recyclable plastic materials, guaranteed for 5 years, the product stands up to outdoor weather and has nothing to rust or corrode.

6×4 Wooden Shed with Halls Rainsaver Gutter Kit installed
How to fit guttering to a shed:
Remove the Rainsaver kit from the frustration-free packaging (this will probably take you longer than the fitting!). The standard 6ft package contains, all in black colour:
1 x 1.7m (5′ 6″) length of 75mm guttering
1 x stop-end outlet
1 x 1.0m (3′ 3″) length 50mm downpipe
1 x stop-end
and 2 x unique Hall’s Rainsaver brackets.
Longer kits include additional lengths of guttering and connection unions.
Fitting (also see our short one minute installation video):
- Slide the brackets to roughly equal positions along the gutter.
- Clip the stop-end in place (this keeps rain water from leaking out of the open end!)
- Offer up to your shed roof, nip-up clamp to secure. Do not overtighten.
- Place the downpipe in your water container and connect to the stop-end outlet, the downpipe presses into the outlet and does not require any additional fixing brackets.
- Fine tune the positioning of the gutter by rotating in the brackets so the downpipe is vertical.
If that takes more than 5 minutes, we’d very much like to know!
Now sit back and wait for the rain to rapidly fill your water container, then you can if you so wish move the gutter and fill up another.
We recommend checking the tightness of the clamps periodically after the gutter is positioned or moved.

Hall’s Rainsaver on 6×4 Keter Plastic Shed courtesy G. Ferguson, Sale
How to move shed guttering:
When your water container is full (or if you want to remove to e.g. paint), you can simply loosen the clamps by hand, relocate the rainsaver to the other side of the shed, or swap the downpipe around to fill up another water container on another corner of the shed.
Depending on the size of your shed you may also be able to slide the rainsaver gutter along the shed to fill up water butts next to each other! This has been done on a 24ft shed with great success.
We also use standard 75mm guttering so you can extend the kit yourself if you like, and we sell longer kits and spare parts in our online shop.
Want the water butt somewhere else?
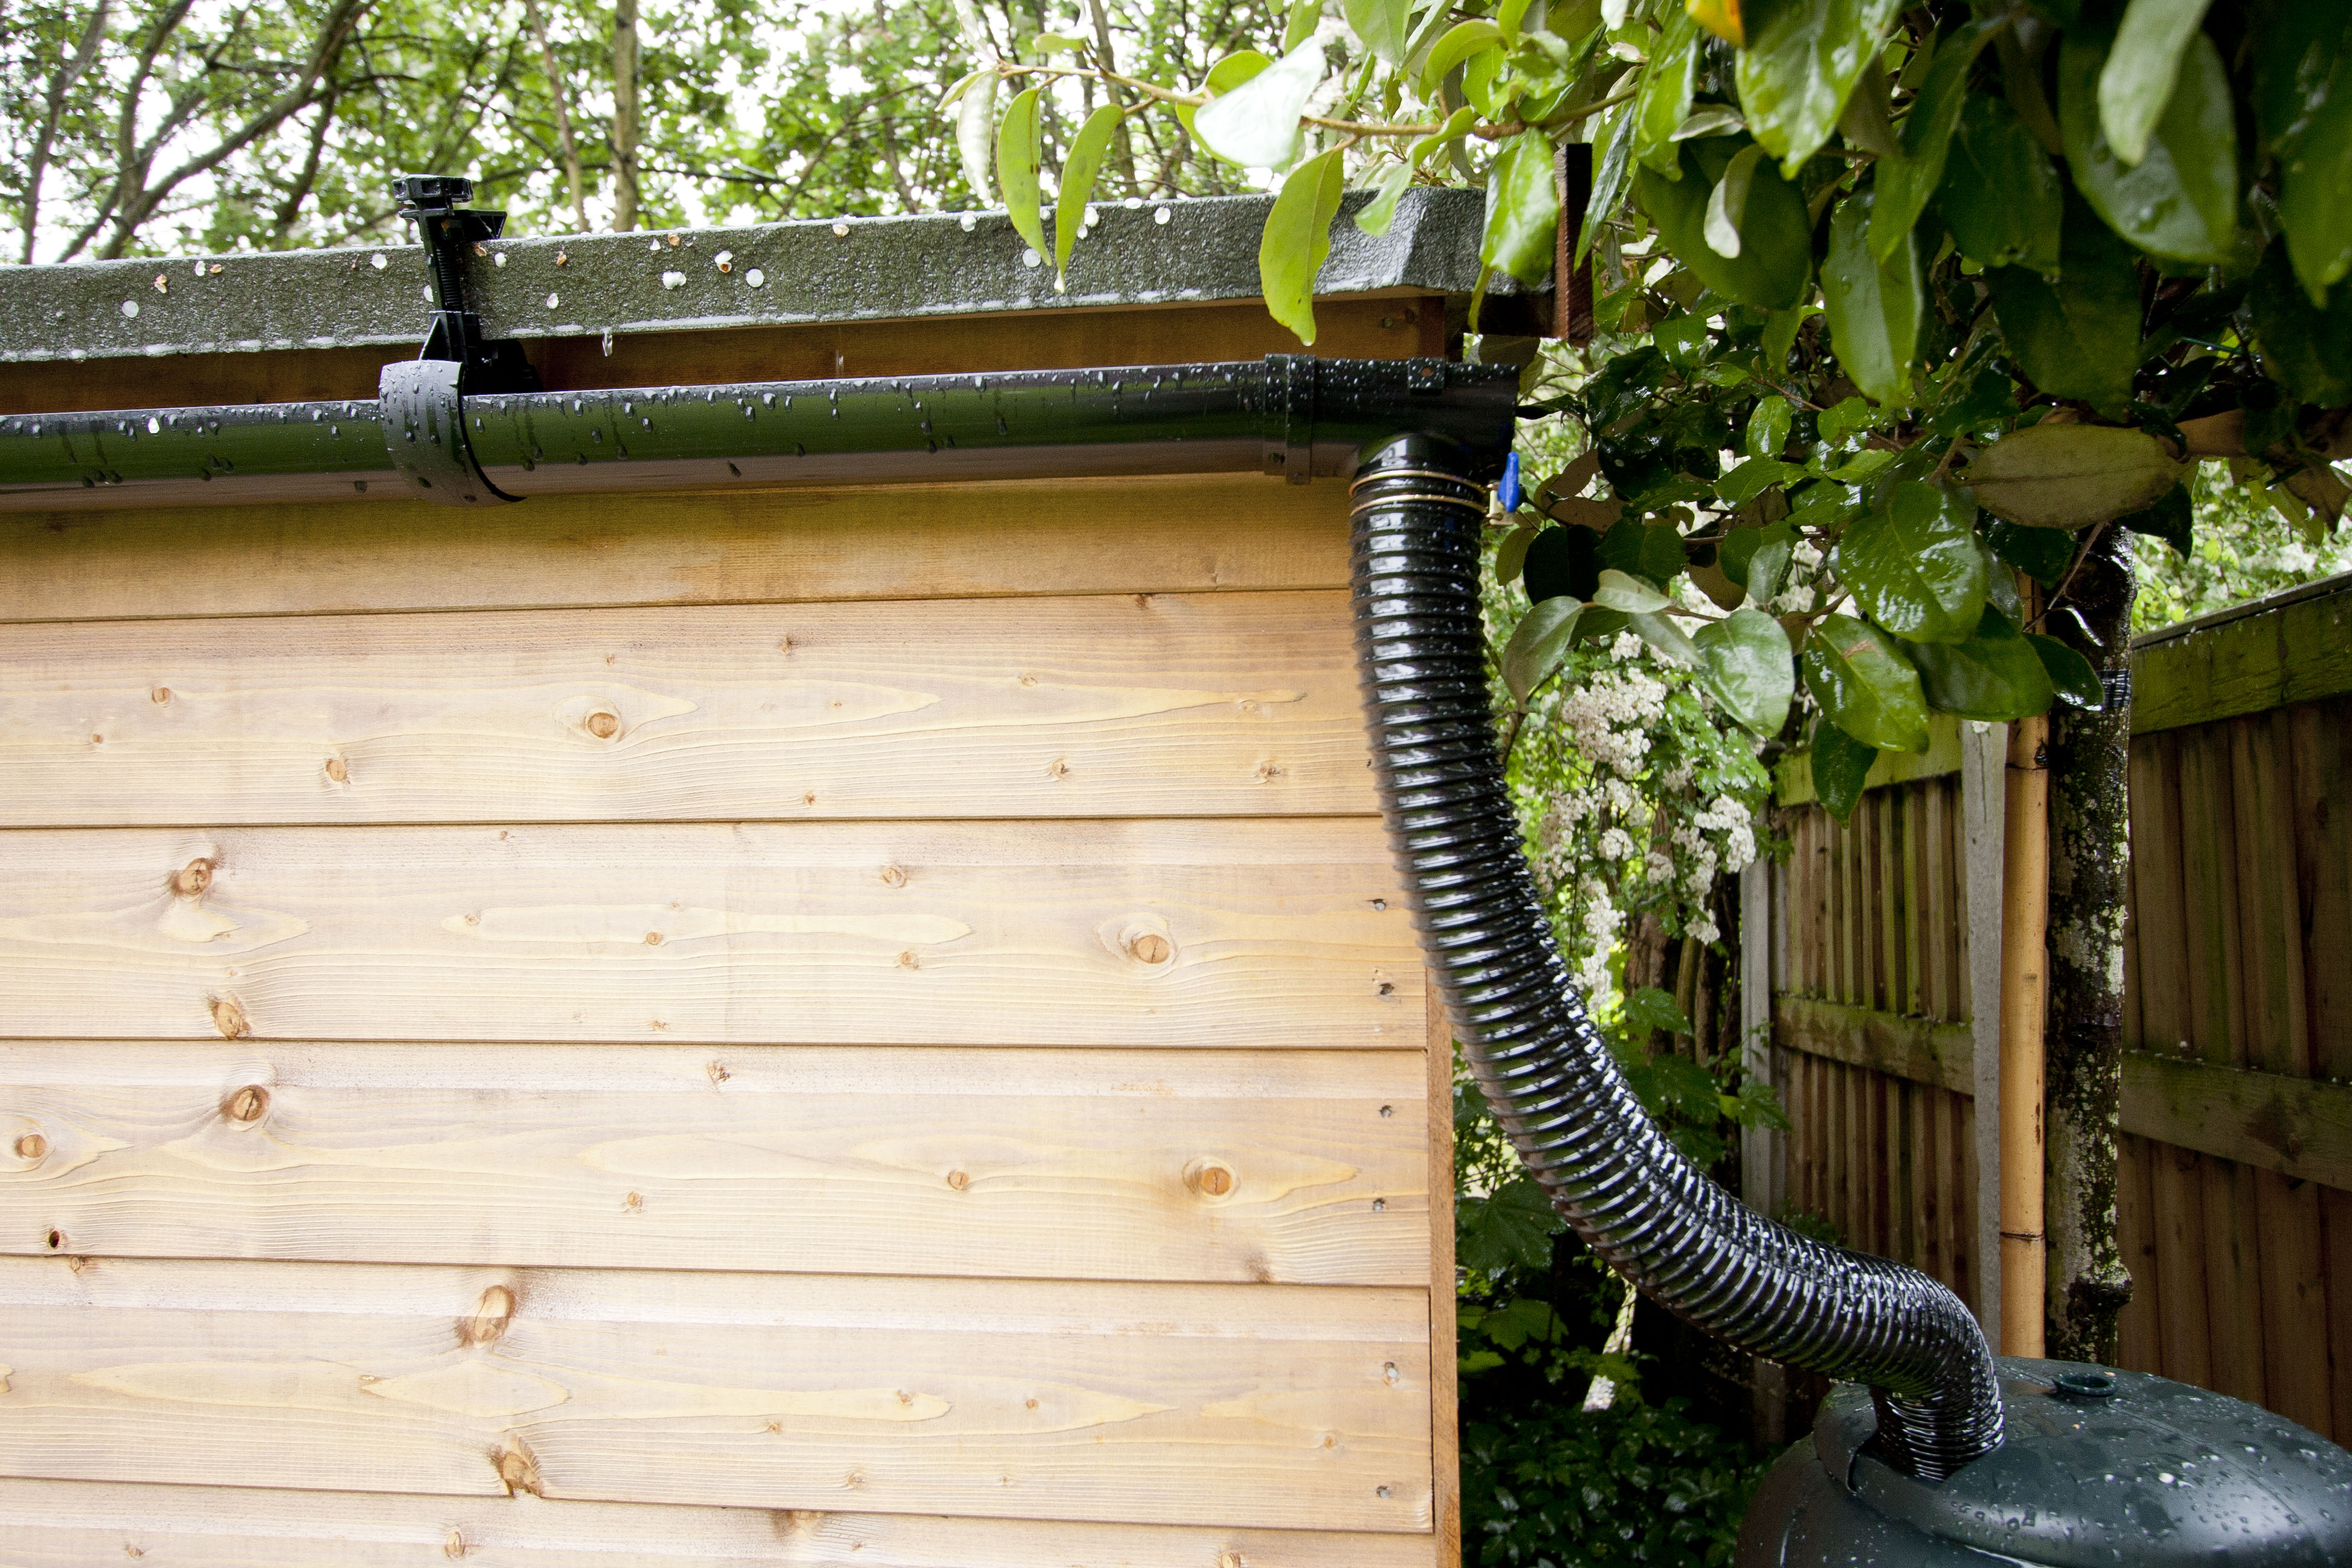
Our new Flexible Downpipe option allows collection of rainwater to be piped almost anywhere. Some customers prefer the water butt to the back of the shed where there is no guttering, and maybe guttering on both sides and this previously meant complicated situations with 90 degree bends and problems in supporting the gutter. The flexible pipe solves both problems with ease as you can just bend it to where it is needed!
If you are adding the flexible pipe to existing guttering you own that isn’t one of our kits, please check the dimensions – we do a smaller diameter 51mm flexible pipe as well for the 50mm downpipes from other guttering suppliers and a larger 70mm flexible pipe for the 68mm household guttering round downpipes. These require separate jubilee clips.
 Cutting a hole or notch in a water butt lid is usually fairly simple with careful use of a sharp knife – most lids are a fairly soft plastic material.